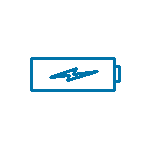
When the unit is shipped the batteries are not charged. Before first use the unit must be left on charge
for at least 16 hours.
Procedure For Use
Disconnect both ends of the cable to be tested.
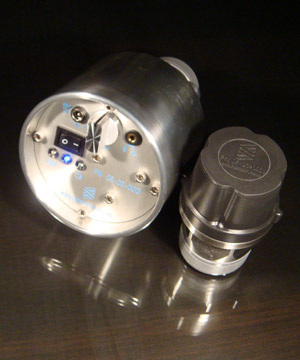
Install the Cable Test Terminator in the remote end of the cable. If spanners are required to tighten the
connector they should not be used on the polyurethane molded part of the terminator but on the connector itself.
Install the Cable Tester in the the local end of the cable. If spanners are required to tighten the connector they
should be used on the connector itself and not the body of the cable tester.
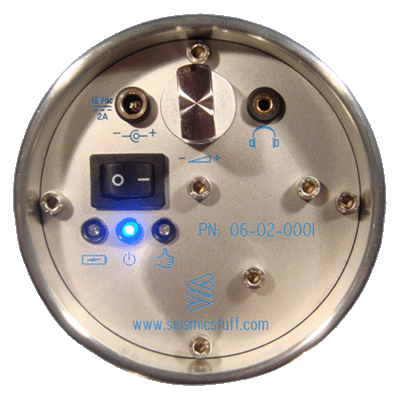
Reduce the volume control to a minimum and plug the headphones into the headphone output socket.
Turn on the cable tester using the front panel rocker switch.
The BLUE lamp should light, this means the unit is powered up and working. If it doesn't light up the batteries may be
descharged in the unit and it will need to be recharged before use. It is recommended to always maintain the batteries
charged and ready for use as well as having a spare unit as a backup to be always ready for testing.
The GREEN lamp should light when continuity is good through all conductors in the cable under test. If it doesn't light
then there is an open circuit in the cable which will need replacing. No more tests can be conducted on a
cable without continuity on all conductors.
If the GREEN lamp is lit then the volume can be slowly increased until a faint hissing sound is heard. This sound is
the background resistive noise within the cable itself amplified many times by the unit and is normal. The amplifier within the
cable tester is very sensitive and there is no need for the volume to be increased beyond this point - false results for the
status of the cable can occur if the volume is increased too much.
 Whilst listening to the headphones, the cable under test can be flexed and stress tested along its length.
If locations are found where stressing the cable or flexing the cable causes large amounts of sound to be heard - clicks,
hums or crackling in the headphones, this is indicative of a bad cable which will need to be changed out. These faults can
be either intermittent leakage, intermittent open circuits or partially broken conductors changing resistance
whilst being flexed.
Whilst listening to the headphones, the cable under test can be flexed and stress tested along its length.
If locations are found where stressing the cable or flexing the cable causes large amounts of sound to be heard - clicks,
hums or crackling in the headphones, this is indicative of a bad cable which will need to be changed out. These faults can
be either intermittent leakage, intermittent open circuits or partially broken conductors changing resistance
whilst being flexed.
When disconnecting the unit, reduce the volume control to a minimum and remove the headphones before turning the unit off.
When in use testing cables for long periods the unit itself can become quite warm - this is normal.
The cable tester consumes a large amount of power during testing and the aluminium housing of the tester is used as a
heatsink for some of the electronic components inside. If the case does become excessively hot during use, such that it
feels too hot to touch, please discontinue use until the unit cools down again before continuing testing. If high usage
is envisaged it will be worth investing in a backup tester.
When connected to a cable and powered on the unit consumes large amounts of power and will drain the batteries rapidly.
Typically the unit can be used for around one hour on a full battery charge.
When no longer actively testing, the unit should be switched off to extend the usage time of the batteries.
The unit can be recharged by plugging in the 12V power supply when the RED charging lamp should light. The unit does not
need to be turned on to be charged. The unit will be fully recharged in around 16 hours when the 12V supply should be
disconnected. Do not leave the power supply connected even when turned off or the batteries will discharge through the
power supply. The unit should not be left on continuous charge as this will shorten the life of the internal batteries.
Front Panel Iconography
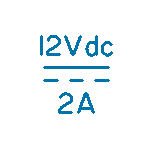 |
The specification for the input voltage. For the cable tester this is
12V DC and up to 2 amps when using the unit (although only 100mA when charging). |
 |
The polarity specification for the input voltage. Positive on centre pin. |
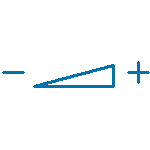 |
Rotating the volume knob to the left reduces the volume, rotating the knob to the right increases the volume. |
 |
This is the headphone jack socket. The socket is a standard 3.5mm stereo jack plug. |
 |
The power indicator lights up in blue when the unit is turned on. |
 |
The charging indicator lights up in red when the unit is charging. The unit doesn't need to be turned on for the
unit to charge just connected to the 12V supply. |
 |
This indicator lights up in green when the unit is turned on and there is good conductivity through all wires of
the cable under test. Only when this lamp is on can the cable be tested for intermittent faults. |
| 


